Activecell Offset VBA
In this Article
This tutorial will demonstrate how to use Activecell Offset in VBA.
The ActiveCell is a property of VBA that represents the cell address of the active cell in your worksheet. If the cursor is positioned in cell A1 then the ActiveCell property in VBA will return the cell address of “A1”. The are a number of properties and methods that are connected to the ActiveCell. In this article we are concentrating on the ActiveCell.Offset method.
ActiveCell.Offset Properties and Methods
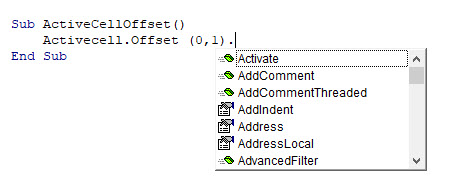
Activecell.Offset has a number of properties and methods available to be programmed with VBA. To view the properties and methods available, type the following statement in a procedure as shown below, and press the period key on the keyboard to see a drop down list.

Methods are depicted by the green method icon, and properties by the small hand icon. The properties and methods for the ActiveCell.Offset method are the same as for the ActiveCell method.
ActiveCell.Offset Syntax
The syntax of ActiveCell.Offset is as follows

where the RowOffset and ColumnOffset is the number of rows to offset (positive numbers for down, negative number for up) or the number of columns you wish offset (positive numbers offsets to the right, negative number to the left).
ActiveCell.Offset..Select
The Activecell.Offset..Select method is the most commonly used method for with Activecell.Offset method. It allows you to move to another cell in your worksheet. You can use this method to move across columns, or up or down rows in your worksheet.
To move down a row, but stay in the same column:
Activecell.Offset(1,0).SelectTo move across a column, but stay in the same row:
Activecell.Offset (0,1).SelectTo move down a row, and across a column:
Activecell.Offset (1,1).SelectTo move up a row:
Activecell.Offset(-1,0).SelectTo move left a column:
Activecell.Offset(0,-1).SelectIn the procedure below, we are looping through a range of cells and moving down one row, and across one column as we do the loop:
Sub ActiveCellTest()
  Dim x As Integer
  Range("A1").Select
  For x = 1 To 10
   ActiveCell = x
   ActiveCell.Offset(1, 1).Select
  Next x
End Sub
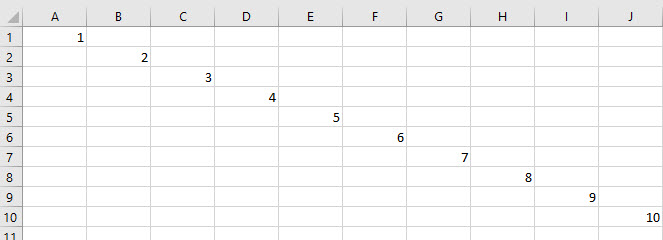
The result of which is shown in the graphic below:

The Loop puts the value of i (1-10) into the Activecell, and then it uses the Activecell.Offset property to move down one row, and across one column to the right – repeating this loop 10 times.
Using Range Object with Activecell.Offset Select
Using the Range Object with the active cell can sometimes confuse some people.
Consider the following procedure:
Sub ActiveCellOffsetRange()
  Range("B1: B10").Select
  ActiveCell.Offset(1, 1).Range("A1").Select
End Sub
With the ActiveCell.Offset(1,1.Range(“A1”), the Range(“A1”) has been specified. However, this does not mean that cell A1 in the sheet will be selected. As we have specified the Range(“B1:B10”), cell A1 in that range is actually cell B1 in the workbook. Therefore the cell will be offset by 1 row and 1 column from cell B1 NOT from cell A1.

Therefore, the Range(“A1′) in this instance is not required as the macro will work the same way with it or without it.
Alternatives to ActiveCell
Instead of using Activecell with the Offset method, we can also use the Range object with the Offset method.
Sub RangeOffset()
 Range("B1").Offset(0, 1).Select
End Sub
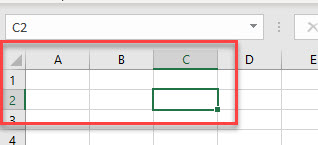
The procedure above would select cell C1 in the worksheet.